 Online: 28428
Excel > Back to Basic
Named range, named constant in Excel
How to define & use Named range, Named constant in MS Excel?
In the previous post, we learnt about how to protect a MS Excel file. In this post, we shall learn how to created Named range, Named constant in MS Excel and how to edit, delete and use them.
What is Named range or Named constant in MS Excel?
Named range is a range of cells that has been given a specific name so that it is easy to understand in the Formula.
Named constant is a name given to a constant value so that the same can be easily understood and can be reused at multiple places.
How to create Named range in MS Excel?
There are two ways to create Named ranges.
- Select the range of cells you want to name, in this case we have selected all Salary cells (E4:E17). Now go to the name box (top-left in below picture) and write name and hit Enter key.
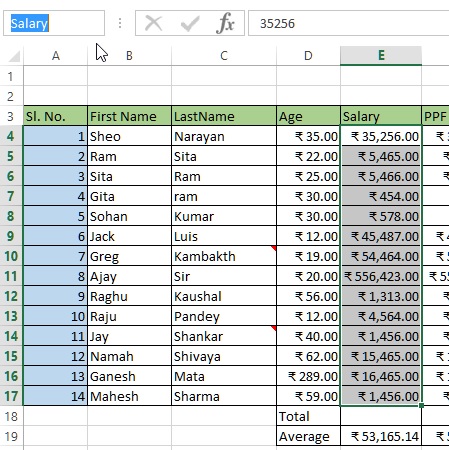
Salary name has been created. - The other way is to use the Ribbon bar and Dialog box. Click on 'Define name' dropdown from 'Formula' tab after selecting the range of cells to name.
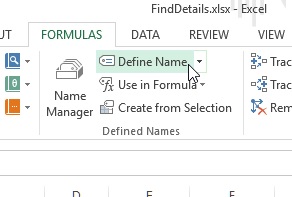
You would see something like this. Now write the Name and hit OK.
How to create a Named constant in MS Excel?
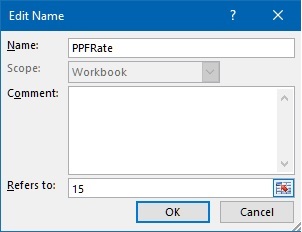
Click on 'Define name' from the Formula tab, you would see 'New Name' dialog box. Write the Name in the 'Name:' box and constant value in the 'Refers to:' box.
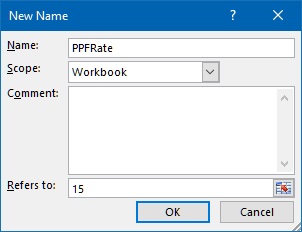
Click OK. This will create a Named constant that can be used in the formulas.
How to edit, delete named range or named constant in MS Excel?
To delete, edit named range or named constant click on 'Name Manager'.

that will open following dialog box.
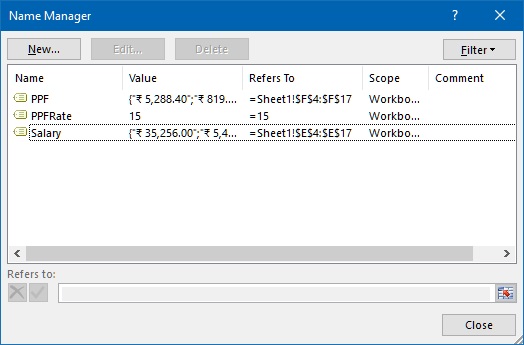
To edit, select a Name (row) and click OK. Modify the respective textboxes values and click OK.
To delete, select any of the formula and click on Delete button.
How to use Named range and Named constant in MS Excel?
To use Named range or Named constant, press F3 at the edit mode of Cell and you would see 'Paste Name' dialog box. Click OK and the selected name appears in blue color in the cell.

or select a cell, click on 'Use in Formula' command dropdown from Formulas tab on the ribbon and you would see list of Names, click on desired one to paste in the cell.
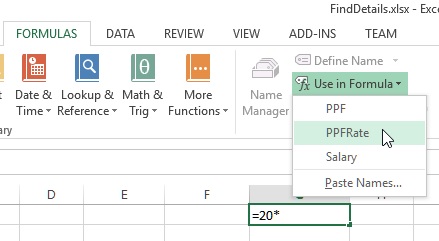
The result looks like this
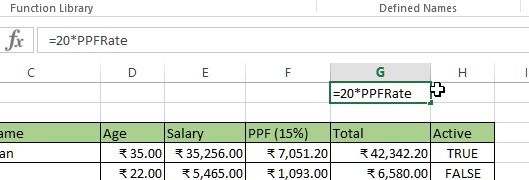
The other way of using Named range or constant is to start typing their name in the Formula and you woudl see an intellisens like below. Select the formula name and that particular name will be in the cell.
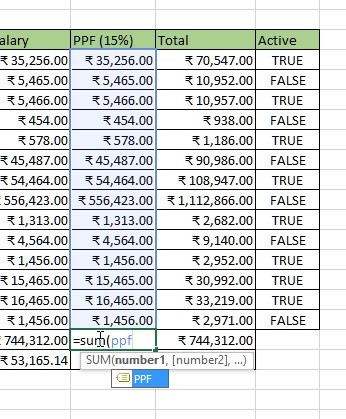
You can see that instead of writing '=(E4*15)/100', we have written '=(E4*PPFRate)/100'. Here PPFRate is Named constant.

The benefit of using Named constant here is that if for some reason PPFRate is changing, we can simply go to that Named constant and change it's value and all the related cells value will be changed. If this were a direct value instead of Named constant then we had to go to every cell to update the calculations.
Views: 8621 | Post Order: 13


