Online: 20265


 Online: 20265
In the previous post, we learnt how to install SQL Server and SQL Server Management Studio. In this post, we shall learn how to work with the SQL Server Management studio.
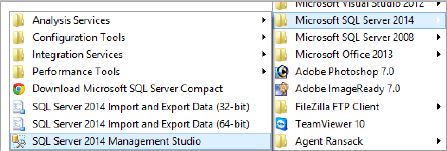
To connect to database using Microsoft Management Studio, first open it from the Programs or click the SQL Server xxxx Management Studio icon like below.
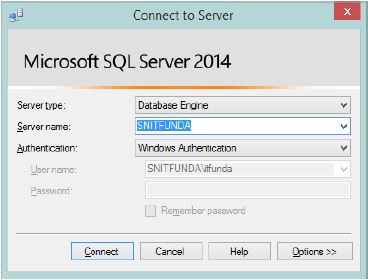
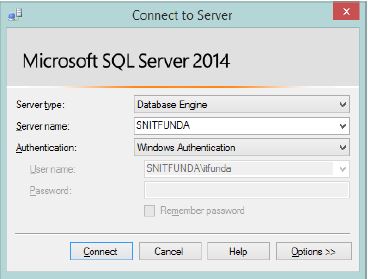
The first screen it gives us a dialog box named Connect to Server screen like below
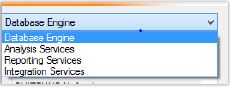
This allows us to choose the Server type, SQL Server Management Studio can connect any of four server type as shown below.
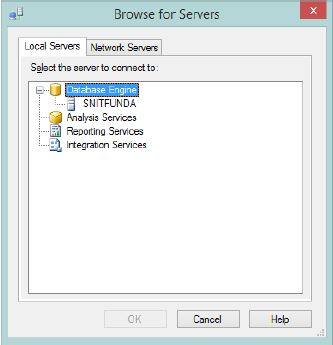
The next box allows us to choose the Server to connect to. In general, this is the name of computer on which the database is installed that is by default written in the TextBox, if not the dropdown icon can be clicked and <Browse for more …> option can be selected that gives option to select other server that is either of locally available or on the Network computers.
The third dropdown allows us to select Authentication type to use to connect to the server, it can be Windows Authentication (the system credentials are used to connect) or SQL Server Authentication like below
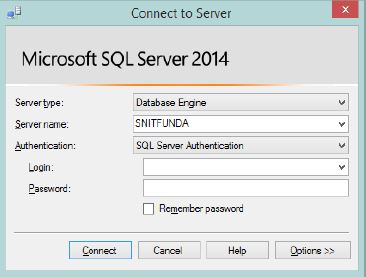
Choosing SQL Server Authentication enables Login and Password textbox to enter proper credentials to connect to the database.
In general, we use Windows Authentication to connect to the local server.
So click on the Connect buttons that gives us the complete screen of SQL Server Management Studio.
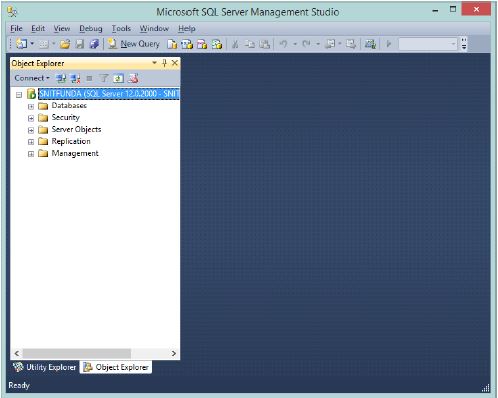
Notice the left side panel that has many folders where appropriate objects related with database are kept. The green Play icon at the top-left panel shows the server name that it is connected to.
Description about left side folder – Most of the developers works mainly on two folders of the left panel and they are
Remaining folders are either for the SQL Server administrators or to perform some advance operations. Few of them we will learn as and when we will progress.
Views: 13163 | Post Order: 2