Online: 417


 Online: 417
ASP.NET MVC scaffolding is a code generation framework that generated code for basic CRUD (create, read, update and delete) operations against the database model using HTML, CSS, JavaScript, Bootstrap and server side selected langulage such as C# or VB.NET. The generated code is based on default templates and it gives us ability to further customize it based on our requirement. This saves a lot of time for the developer by writing basic code to start with.
ASP.NET MVC scaffolding includes view template, controller template, form template, field template, filter template, entity framework template etc.
To scaffold the View and Controller based on Model, we need to configure our web.config (application root) for the database for which we have created the Model. Go to your web.config file and change the connectionStrings value appropriately so that it connects to your database.
<connectionStrings>
 <add name="Default connection" connectionString="Data Source=(LocalDb)\v11.0;AttachDbl
   providerName=System.Data.SqlClient"/>
 </connectionStrings>
Step 1
Change the connectionString value of the above part of the root web.config file. In this case it looks like below
<connectionStrings>
  <add name="DefaultConnection"
          connectionString="Data Source=SNITFunda;Initial
            Catalog=TrainingDatabase;Integrated Security=True"
          providerName="System.Data.SqlClient" />
 </connectionStrings>
Where
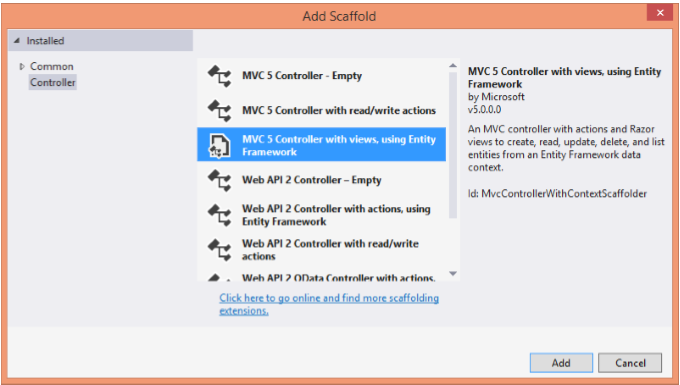
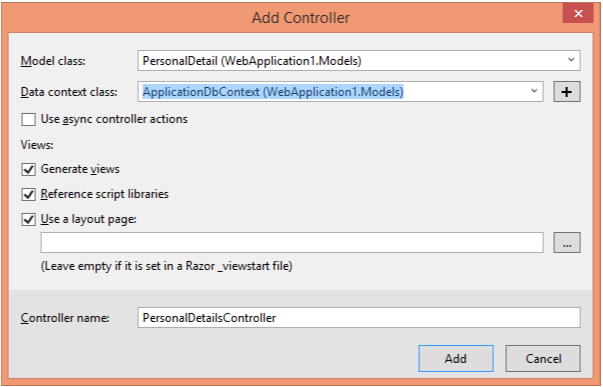
In the next dialog box, Select Model class as the PersonalDetail model, the one that we have just created in previous step. Select ApplicationDbConext as the Data context class (this gets automatically created when we create the project).
Keep the Generate views checkbox checked as we want to create Views too for this Model. The Reference script libraries checkbox makes sure that we have jquery, jquery validate scripts are referenced in the view wherever it is required (mainly in the Create/Edit views. User a layout page checkbox, let us use the default Master page (_Layout.cshtml).
Notice that the Controller name is automatically written based on the Model name selected. Keep it as it is and click Add. Here we are assuming that we have a PersonalDetail model created in the project by following previous post.
In case you get any error after creating Add button that looks something like
The model backing the '' context has changed since the database was created. Consider using Code First Migrations to update the database (http://go.microsoft.com/fwlink/?LinkId=238269).
Double click global.asax page under the root of the application and add following line of the code under Application_Start() event.
System.Data.Entity.Database.SetInitializer<Namespace.Models.ApplicationDbContex t>(null);
And follow above steps (1 to 3) again.
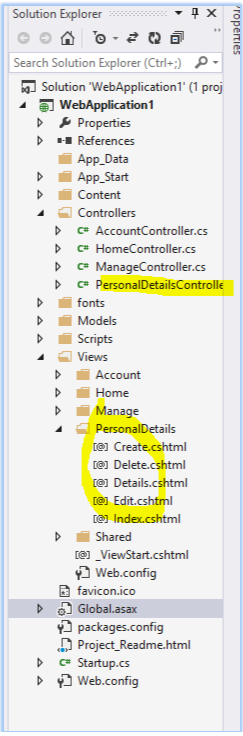
Assuming you successfully completed above steps, notice the change in the Solution Explorer.
You will notice that PersonalDetialsController.cs file gets added into Controllers folder. Apart from controller, a view folder also gets added. All these gets added because of ASP.NET MVC scaffolding templates that exists in Visual studio for ASP.NET MVC application.
In Views folder PersonalDetials folder gets created and following files are also gets created