 Online: 6645
ASP.NET MVC > Entity Framework
Insert record into database in ASP.NET MVC
How to insert a record into database in ASP.NET MVC?
To insert a record into database we can use the same scaffold view Create.cshtml and Create action methods in the controller.
CONTROLLER ACTION METHODS
        // GET: PersonalDetails/Create
        public ActionResult Create()
        {
            return View();
        }

        // POST: PersonalDetails/Create
        // To protect from overposting attacks, please enable the specific
properties you want to bind to, for
        // more details see http://go.microsoft.com/fwlink/?LinkId=317598.
        [HttpPost]
        [ValidateAntiForgeryToken]
        public ActionResult Create([Bind(Include =
"AutoId,FirstName,LastName,Age,Active")] PersonalDetail personalDetail)
        {
            if (ModelState.IsValid)
            {
                db.PersonalDetails.Add(personalDetail);
                db.SaveChanges();
                return RedirectToAction("Index");
            }

            return View(personalDetail);
        }
The first Create method simply returns the Create.cshtml view from /Views/PersonalDetails folder whose model is specified as PersonalDetail.
CREATE.CSHTML VIEW
@model WebApplication1.Models.PersonalDetail

   @{
       ViewBag.Title = "Create";
   }

   <h2>Create</h2>

   @using (Html.BeginForm())
   {
       <text>

       First name: <input type="text" name="FirstName" />
       Last name: <input type="text" name="LastName" />
       <input type="submit" value="Submit" />
       </text>
   }

   @using (Html.BeginForm())
   {
       @Html.AntiForgeryToken()

       <div class="form-horizontal">
           <h4>PersonalDetail</h4>
           <hr />
           @Html.ValidationSummary(true, "", new { @class = "text-danger" })
           <div class="form-group">
               @Html.LabelFor(model => model.FirstName, htmlAttributes: new { @class =
"control-label col-md-2" })
               <div class="col-md-10">
                   @Html.EditorFor(model => model.FirstName, new { htmlAttributes = new
{ @class = "form-control" } })
                   @Html.ValidationMessageFor(model => model.FirstName, "", new {
@class = "text-danger" })
               </div>
           </div>
           <div class="form-group">
               @Html.LabelFor(model => model.LastName, htmlAttributes: new { @class =
"control-label col-md-2" })
               <div class="col-md-10">
                   @Html.EditorFor(model => model.LastName, new { htmlAttributes = new
{ @class = "form-control" } })
                   @Html.ValidationMessageFor(model => model.LastName, "", new { @class
= "text-danger" })
               </div>
           </div>
           <div class="form-group">
               @Html.LabelFor(model => model.Age, htmlAttributes: new { @class =
"control-label col-md-2" })
               <div class="col-md-10">
                   @Html.EditorFor(model => model.Age, new { htmlAttributes = new {
@class = "form-control" } })
                   @Html.ValidationMessageFor(model => model.Age, "", new { @class =
"text-danger" })
               </div>
           </div>
           <div class="form-group">
               @Html.LabelFor(model => model.Active, htmlAttributes: new { @class =
"control-label col-md-2" })
               <div class="col-md-10">
                   <div class="checkbox">
                       @Html.EditorFor(model => model.Active)
@Html.ValidationMessageFor(model => model.Active, "", new {
@class = "text-danger" })
                   </div>
               </div>
           </div>
           <div class="form-group">
               <div class="col-md-offset-2 col-md-10">
                   <input type="submit" value="Create" class="btn btn-default" />
               </div>
           </div>
       </div>
    <div>
        @Html.ActionLink("Back to List", "Index")
    </div>
    @section Scripts {
@Scripts.Render("~/bundles/jqueryval")
}
In the above view we have a View using @Html.BeginForm() having @Html.AntiForgeryToken() method (explained above). There are many more Html helper methods used for different purpose
@Html.ValidationSummary– to show summary of the validation failed error. It generally shows those error that has been added with Empty key value in the ModelState.AddModelError@Html.LabelFor– used to create label for that particular property or Html form element-
@Html.EditorFor- used to render Html form element corresponding to field type (string, integer, date type etc.) -
@Html.ValidationMessageFor– used to create a placeholder that will show error message for that field.
Remaining HTML are simple HTML codes used to create Form layout, CSS classes used in this form comes from bootstrap classes.
The second Create method of the Controller binds the property of the PersonalDetail method (it is not mandatory however to avoid over posting attack, this is the way where only those properties of the Model is retrieved from the form that are used in the Bind.). Inside the action method, we call ModelState.IsValid property that validates each model property against the validation attribute used in the Model and it returns true or false. If validation is passed, the same PersonalDetail object is added into PersonalDetails collection and SaveChanges() method is called to save the data into the database. Then user gets redirected to the Index view.
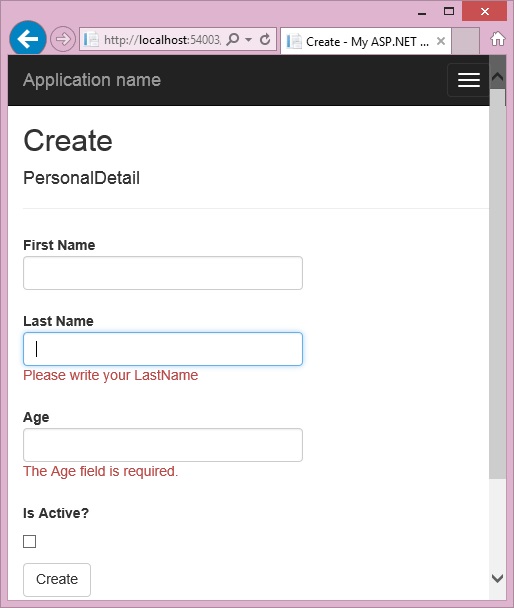
If the validation fails, the user sees the same Create view again with validation errors.

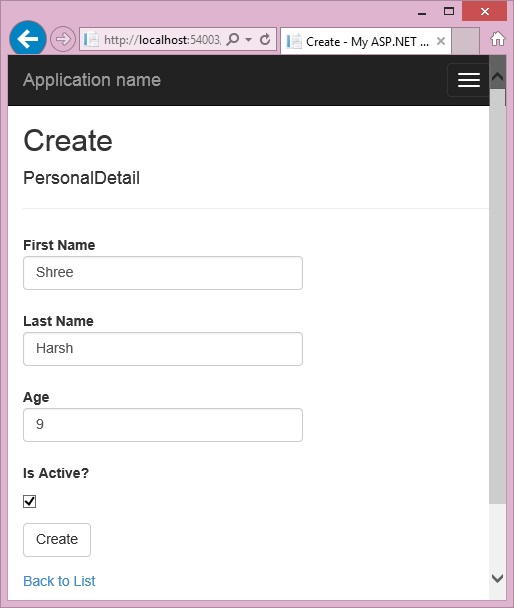
If everything is fine, it create a new record into the database and redirect the user to the Index page.


