 Online: 16554
Sharepoint > Office Web Apps
How to deploy Microsoft Office Web Apps 2013 in Sharepoint
How to integrate Microsoft Office Web Apps 2013 with Sharepoint 2013
In this section we are going to learn about deployment of Microsoft Office Web Apps 2013 and steps to integrate with SharePoint 2013.
Prerequisites:
- All servers must be domain joined
- .Net 4.0 or higher is installed
- IIS 7.0 (role needs to be turned on through Webserver(IIS) role
- PowerShell 3.0 is installed
- Load balancer for multi-machine farms
- Dedicated server with no applications installed (that are using port 80 or 443)
- No other software’s such as SharePoint/Domain Controller/ Exchange are not installed on OWA Servers.
Office Web Apps sample URL
http://officewebapps.test.com
General Guidelines for installing:
- To minimize the complexity of the deployment install all office web apps roles on each server instead of distributing the roles on servers.
- Microsoft Office web Apps 2013 does not require SQL database.
- PowerShell is used to define Office Web Apps topology, by using New-OfficeWebAppsFarm command with the master server (the first server in the farm) and by using New-OfficeWebApps Machine command to join more machines to the farm.
- Also PowerShell commands are used to connect the SharePoint farm to Office Web Apps farm.
- In case of installing updates and patches, the Office Web Apps server should be disconnected from the Office Web Apps farm then joined again after finish the patching.
- SharePoint system account can’t render office web apps (by design for security)
Office Web App Server Pre Requisites Installation on Windows 2012
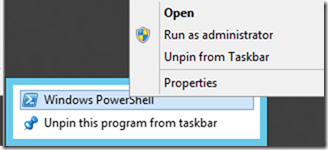
- Login to Office Web App 2013 server and run the PowerShell command as administrator.

- Run the following command to install the required roles and services.
Add-WindowsFeature Web-Server,Web-Mgmt-Tools,Web-Mgmt-Console,Web-WebServer,Web-Common-Http,Web-Default-Doc,Web-Static-Content,Web-Performance,Web-Stat-Compression,Web-Dyn-Compression,Web-Security,Web-Filtering,Web-Windows-Auth,Web-App-Dev,Web-Net-Ext45,Web-Asp-Net45,Web-ISAPI-Ext,Web-ISAPI-Filter,Web-Includes,InkandHandwritingServices,NET-Framework-Features,NET-Framework-Core,NET-HTTP-Activation,NET-Non-HTTP-Activ,NET-WCF-HTTP-Activation45
- Restart the server
Office Web App Server Installation
- Mount Office Web Apps 2013 install setup on the OWA server and run the Install
- On the Read the Microsoft Software License Terms page, select I accept the terms of this agreement and click Continue.
- On the Choose a file location page, select the folder where you want the Office Web Apps Server files to be installed (for example, C:\Program Files\Microsoft Office Web Apps) and select Install Now.
- When setup finishes installing Office Web Apps Server, choose Close.
- Download and install Office Web Apps Server SP1
- Download and install the Office Web Apps Server 2013 July update
Office Web App Server Configuration
- Login on to OWA Server
- Install the Office Web Apps Server update on that server.
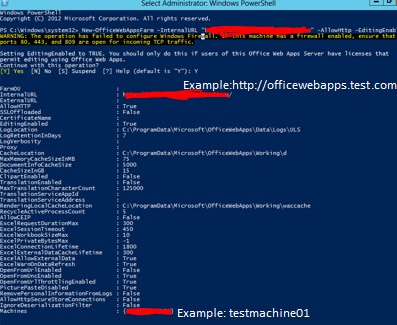
New-OfficeWebAppsFarm -InternalURL "http://officewebapps.test.com" -AllowHttp –EditingEnabled

- Now open IIS and notice the creation of the new web application
- A typical and very fast way to verify WOPI is working is to simply navigate to the discovery URL
http://officewebapps.test.com/hosting/discovery
Office Web App Server integration with SharePoint 2013 Server
- Login to any one of the SharePoint 2013 Web Front End server.
- Run SharePoint 2013 Management Shell as Administrator
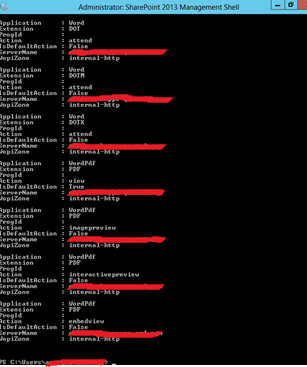
New-SPWOPIBinding –ServerName “officewebapps.test.com” –AllowHTTP
- Now you should see a long list application extension registration with the WOPIZone

- To confirm type and test below command to verify that the new zone is internal-http
Get-SPWOPIZone
- Change the AllowOAuthOverHttp setting in SharePoint 2013 to True. Run below command
(Get-SPSecurityTokenServiceConfig).AllowOAuthOverHttp
- That means we will need to allow SharePoint to allow OAuth over HTTP by running below commands
$config = (Get-SPSecurityTokenServiceConfig)
$config.AllowOAuthOverHttp = $true
$config.Update()
![]()
- Now check one more time the status of OAuth over http
(Get-SPSecurityTokenServiceConfig).AllowOAuthOverHttp
![]()
- Now once again check the WOPI Zone and as you can see it is still set to internal-https, if yes then set to internal-http using below methods

- Run the following commands to suppress the XLSX extension from view action, because allowed to continue to open excel documents in Excel Services to avail more features.
New-SPWOPISuppressionSetting -Extension "XLSX" -Action "view"
Add servers to the farm
- After the first server is running Office Web Apps Server, run the following command in OWA2 Server.
New-OfficeWebAppsMachine –MachineToJoin “machine02.test.com"

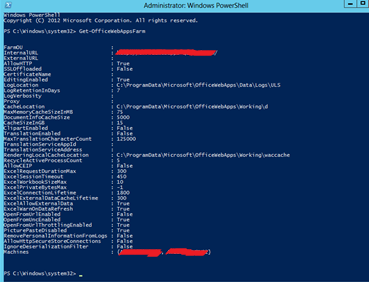
Get-officeWebAppsFarm

Enable the Excel Services & PowerPivot with external data connections.
- Run the following commands to allow external data connections and secure store connections for Excel Services.
Set-OfficeWebAppsFarm -ExcelAllowExternalData
Set-OfficeWebAppsFarm –AllowHttpSecureStoreConnections
Test Office Web Apps with SP 2013
- Browse any SharePoint sites as user (OWA does not work for system account)
Load sample Office documents to test in browser mode.
For Removing SPWOPI binding from SharePoint Servers
- Login to any one of the SharePoint 2013 Web Front End server.
- Run SharePoint 2013 Management Shell as Administrator
Remove-SPWOPIBinding -All:$true


