Online: 8064


 Online: 8064
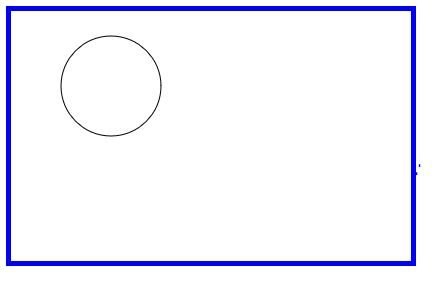
It is used to create the part of the circle or half of the circle
Arc uses the 2*Math.PI and Math.PI and the arc uses the stroke and fill methods to create the arc.
<canvas id="myCanvas" width="400" height="250" style="border:5px solid blue;">
    </canvas>
    <script>
        var canvas = document.getElementById("myCanvas");
        var context = canvas.getContext("2d");

        context.beginPath();
        context.arc(100, 75, 50, 0, 2 * Math.PI);
        context.stroke();
    </script>
"mycanvas" with the width as 400 and height as 250 with the border as 5px solid bluecontext.arc(100, 75, 50, 0, 2 * Math.PI); - It defines the arc with the given X values 2*Math.PI defines the circle and Math.PI defines the semi circleoutput
The x- coordinate of the arc defines moving the arc from left side of the canvas by increasing the values of the x
 <h2 style="color:green">x-coordinate moves right from the canvas  </h2>
    <canvas id="myCanvas" width="400" height="250" style="border:5px solid red;">
    </canvas>
    <script>
        var canvas = document.getElementById('myCanvas');
        var context = canvas.getContext('2d');
        context.beginPath();
        context.arc(300, 75, 50, 0 * Math.PI, 1.5 * Math.PI);
        context.stroke();
    </script>
x coordinate moving from left side of the canvas to right side context.arc(300, 75, 50, 0 * Math.PI, 1.5 * Math.PI); - Context(x, y, r,Math.PI, 2*Math.PI) the x value moves right when the x value is increased and it moves left side when the x value is decreasedoutput

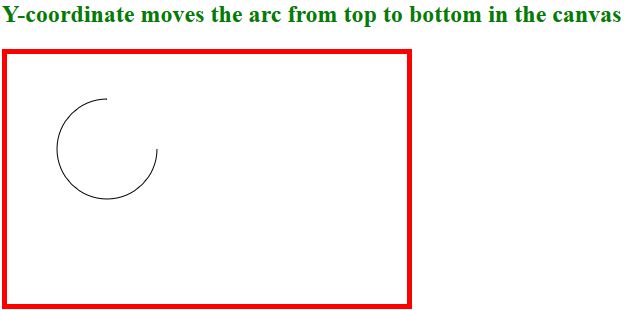
Y- Coordinate is used to move the arc from top to bottom when we increase the value, to move the arc from bottom to top we need to decrease the value
  <h2 style="color:green">Y-coordinate moves the arc from top to bottom in the canvas  </h2>
    <canvas id="myCanvas" width="400" height="250" style="border:5px solid red;">
    </canvas>
    <script>
        var canvas = document.getElementById('myCanvas');
        var context = canvas.getContext('2d');
        context.beginPath();
        context.arc(100, 95, 50, 0 * Math.PI, 1.5 * Math.PI);
        context.stroke();
    </script>
context.arc(100, 95, 50, 0 * Math.PI, 1.5 * Math.PI); - The y value "95" which increments the value from top to bottom in the canvasoutput
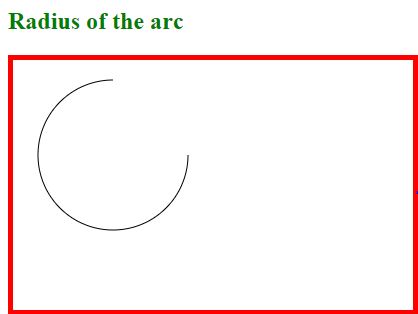
To create radius we need to define the width and height of the object, the radius of the arc is a part of the circle
 <h2 style="color:green">Radius of the arc </h2>
    <canvas id="myCanvas" width="400" height="250" style="border:5px solid red;">
    </canvas>
    <script>
        var canvas = document.getElementById('myCanvas');
        var context = canvas.getContext('2d');
        context.beginPath();
        context.arc(100, 95, 75, 0 * Math.PI, 1.5 * Math.PI);
        context.stroke();
    </script>
radius of the arc, We are having the canvas id as "mycanvas" and the width as 400 and height as 250 context.arc(100, 95, 50, 0 * Math.PI, 1.5 * Math.PI); - It defines the arc with the given values in the canvas element "75" which is used to define the size of the radius of the arcoutput
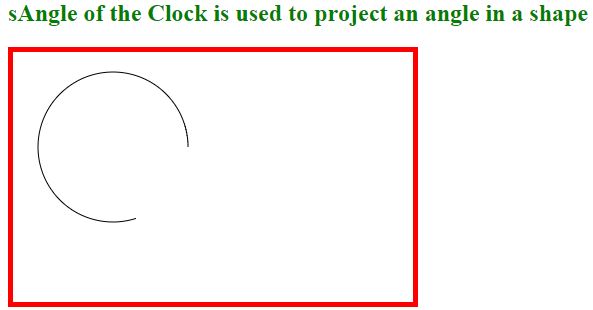
sAngle
It is used as projecting an definite angle by giving the values in the arc
 <h2 style="color:green">sAngle of the Clock is used to project an angle in a shape  </h2>
    <canvas id="myCanvas" width="400" height="250" style="border:5px solid red;">
    </canvas>
    <script>
        var canvas = document.getElementById('myCanvas');
        var context = canvas.getContext('2d');
        context.beginPath();
        context.arc(100, 95, 75, 0.4 * Math.PI, 2 * Math.PI);
        context.stroke();
    </script>
canvas id as "mycanvas" and the width as 400 and height as 250 var canvas = document.getElementById('myCanvas'); - it defines the canvas as with the id as mycanvasvar context = canvas.getContext('2d'); - it defines the context to the canvas elementcontext.beginPath(); - It begins the path context.arc(100, 95, 50, 0 * Math.PI, 1.5 * Math.PI);- It defines the arc with the given values in the canvas element sAngle is used to create the shape of the arc (0*Math.PI) is used to create the shape of the angleoutput
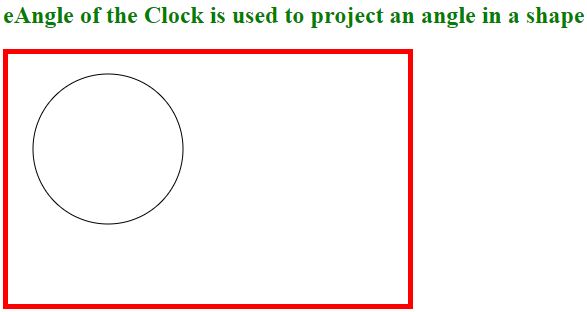
It is used to end the circle by using the 2*Math.PI
<h2 style="color:green">sAngle of the Clock is used to project an angle in a shape  </h2>
    <canvas id="myCanvas" width="400" height="250" style="border:5px solid red;">
    </canvas>
    <script>
        var canvas = document.getElementById('myCanvas');
        var context = canvas.getContext('2d');
        context.beginPath();
        context.arc(100, 95, 75, 0* Math.PI, 2 * Math.PI);
        context.stroke();
    </script>
canvas id as "mycanvas" and the width as 400 and height as 250 var canvas = document.getElementById('myCanvas'); - it defines the canvas as with the id as mycanvasvar context = canvas.getContext('2d'); - it defines the context to the canvas elementcontext.beginPath(); - It begins the path context.arc(100, 95, 50, 0 * Math.PI, 2 * Math.PI);- It defines the arc with the given values in the canvas element eAngle is used to create the shape of the arc 2*Math.PI is used to create the shape of the angleoutput
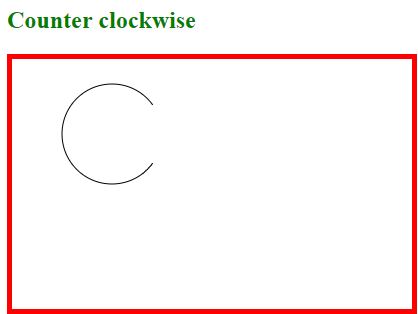
It Specifies whether the drawing should be counter clockwise or clockwise. False is default, and indicates clockwise, while true indicates counter-clockwise/anti-clock wise
<h2 style="color:green">Counter clockwise </h2>
    <canvas id="myCanvas" width="400" height="250" style="border:5px solid red;">
    </canvas>
    <script>
        var canvas = document.getElementById('myCanvas');
        var context = canvas.getContext('2d');
        context.beginPath();
        context.arc(100, 75, 50, 1.8 * Math.PI, 2.2 * Math.PI, true);
        context.stroke();
    </script>
canvas id as "mycanvas" and the width as 400 and height as 250 var canvas = document.getElementById('myCanvas'); - it defines the canvas as with the id as mycanvasvar context = canvas.getContext('2d'); - it defines the context to the canvas elementcontext.beginPath(); - It begins the path context.arc(100, 75, 50, 1.8 * Math.PI, 2.2 * Math.PI, true);- It defines the arc with the given values in the canvas element true is used to indicate clock counter clockwiseoutput